Cedar Wallet
Check Security and find recovery
This tutorial starts after your Pocket is active and, if your scenario needs it, Vault is ready. You will open Security, review how the account is protected, find security-related status in Operations, and learn where emergency recovery starts.
Cedar separates everyday use from recovery. Security is the signed-in place to check protection state and normal access changes. Emergency recovery starts from signed-out Cedar native.
Safety rule
Never share recovery phrases, private recovery material, passkey prompts, or screenshots that reveal them. Cedar support should not ask for them.
What you will do
- Start from your ready Cedar account.
- Open
Security. - Review passkey, phone approval or device-key, recovery phrase, and Pocket-protection status.
- Open
Operationsand find security-related activity. - Review one safe access-change path if Cedar shows one.
- Find the emergency recovery entrypoint from signed-out Cedar native.
- Return to
SecurityandOperationsto confirm the final state.
Before you start
You need:
- A Cedar account with an active Pocket.
- A ready Vault if the selected recovery or access-change path depends on Vault.
- Cedar native installed if the recovery or trusted-device flow is native-led.
- A prepared demo account if you plan to continue past the recovery entrypoint.
You do not need:
- Real money.
- A separate browser wallet.
- Testnet ETH for Cedar gas.
- To share your recovery phrase with anyone.
Step 1: Start from your ready account
Open Cedar with the account you used in the Pocket and Vault tutorials.
You should see:
- Pocket is active.
- Vault is ready, if this scenario needs Vault.
- No pending setup action blocks Security or recovery checks.
If Pocket is not active, complete the first tutorial before continuing. If Vault is required and not ready, complete the Vault tutorial first.
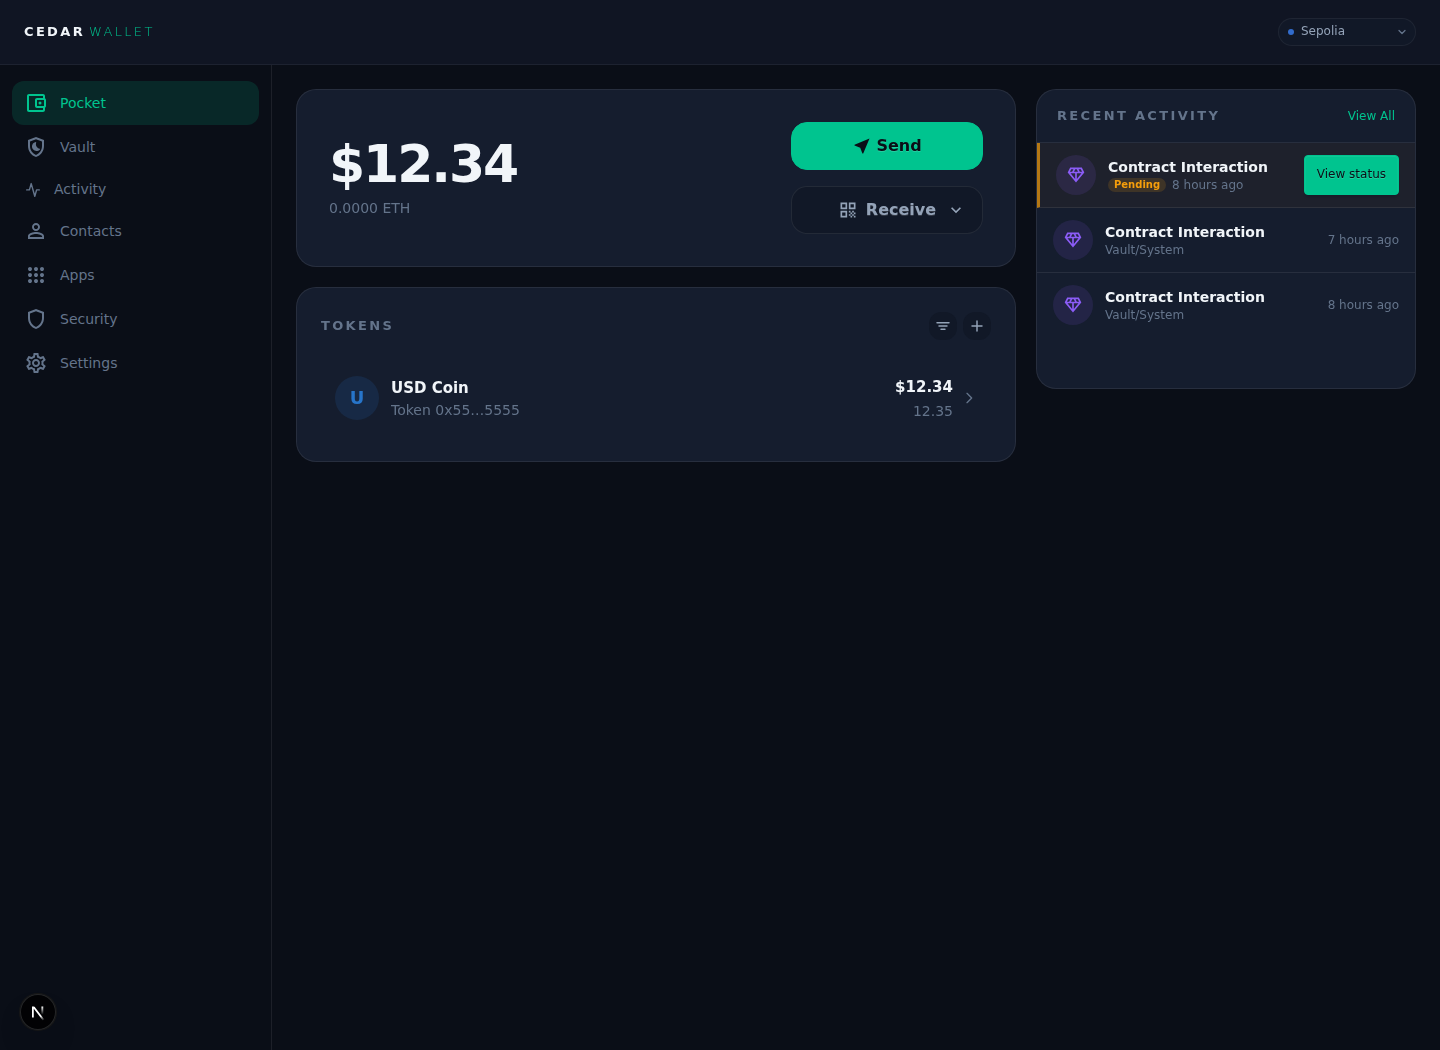
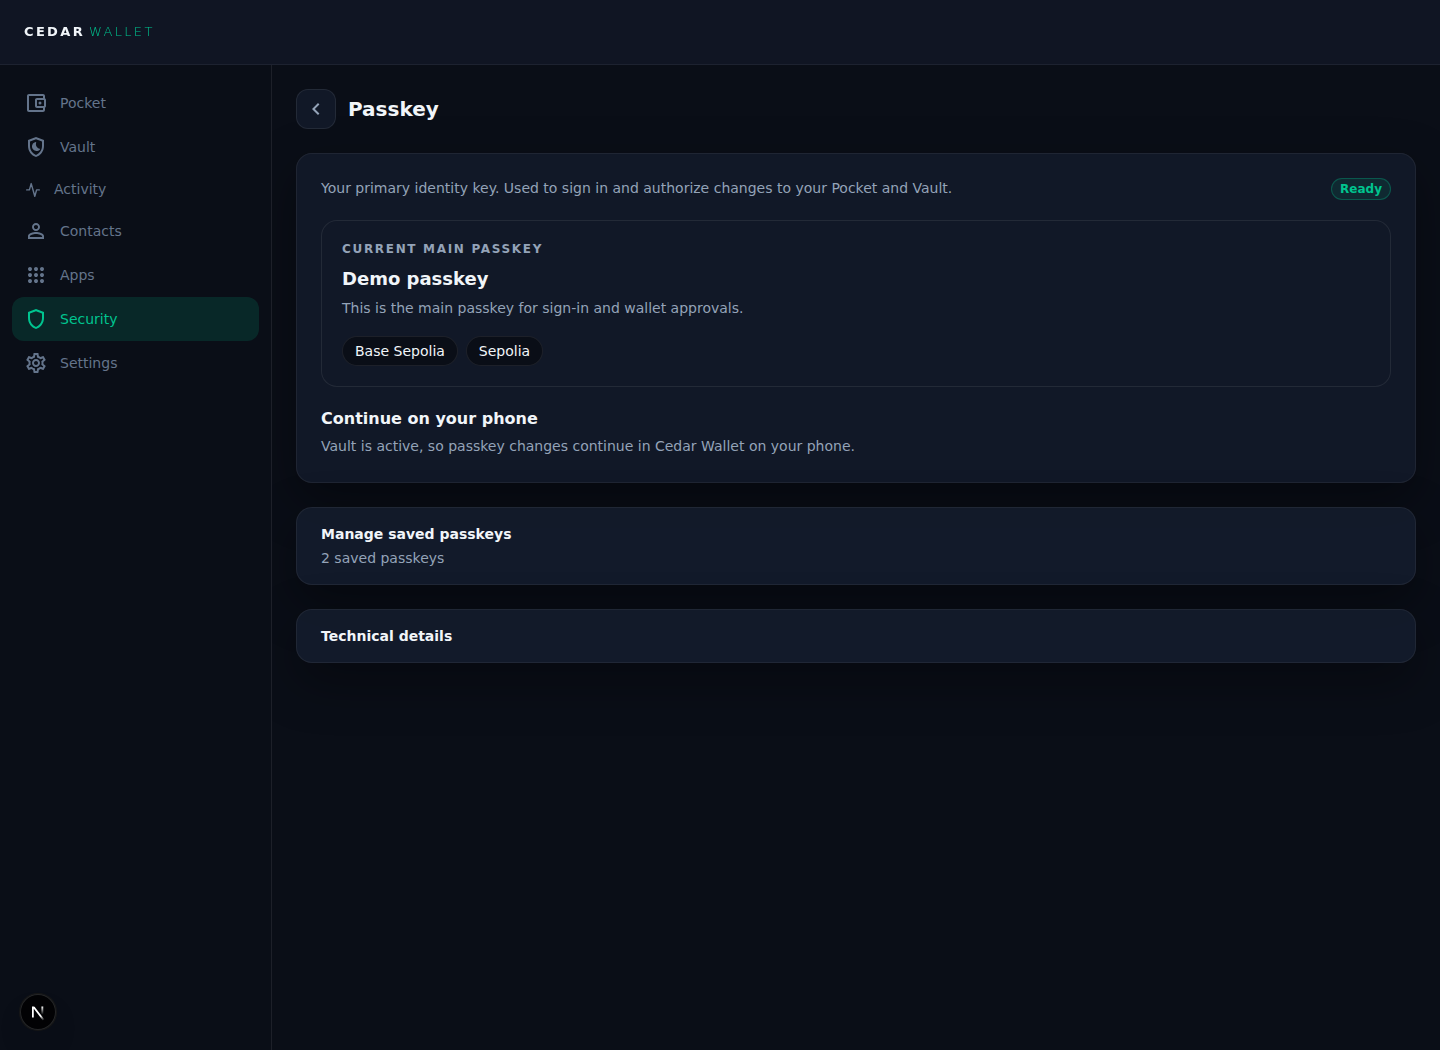
Step 2: Open Security
Open Security in Cedar.
Security shows how your Cedar account is protected. It should show status without asking you to expose private recovery material.
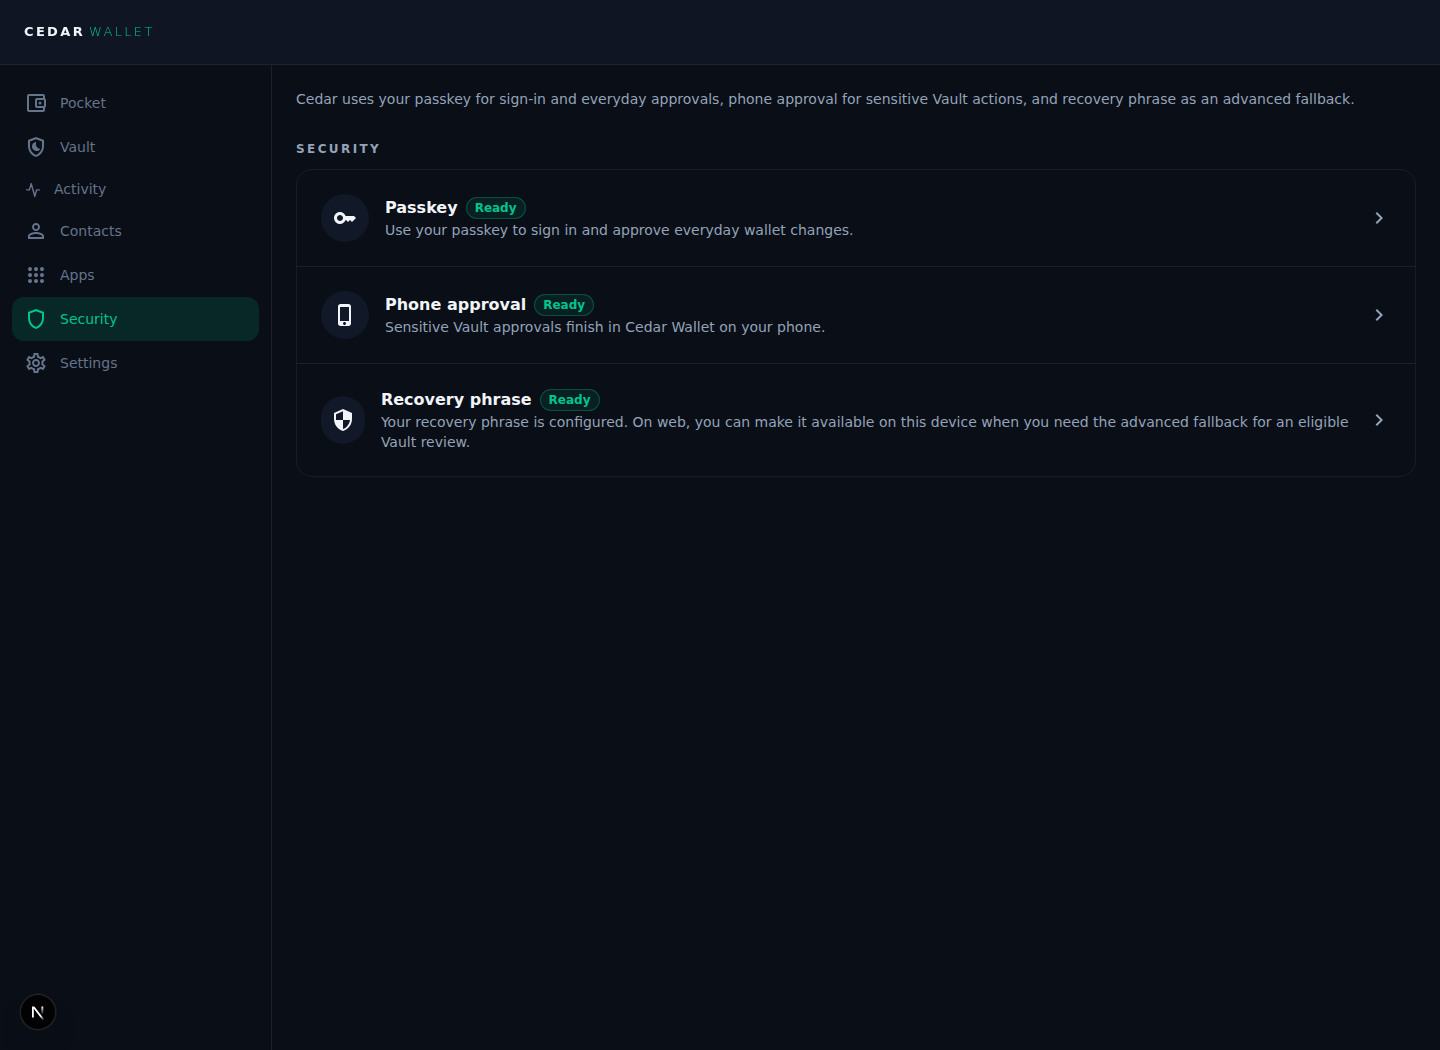
Step 3: Review your protection state
Review each protection area.
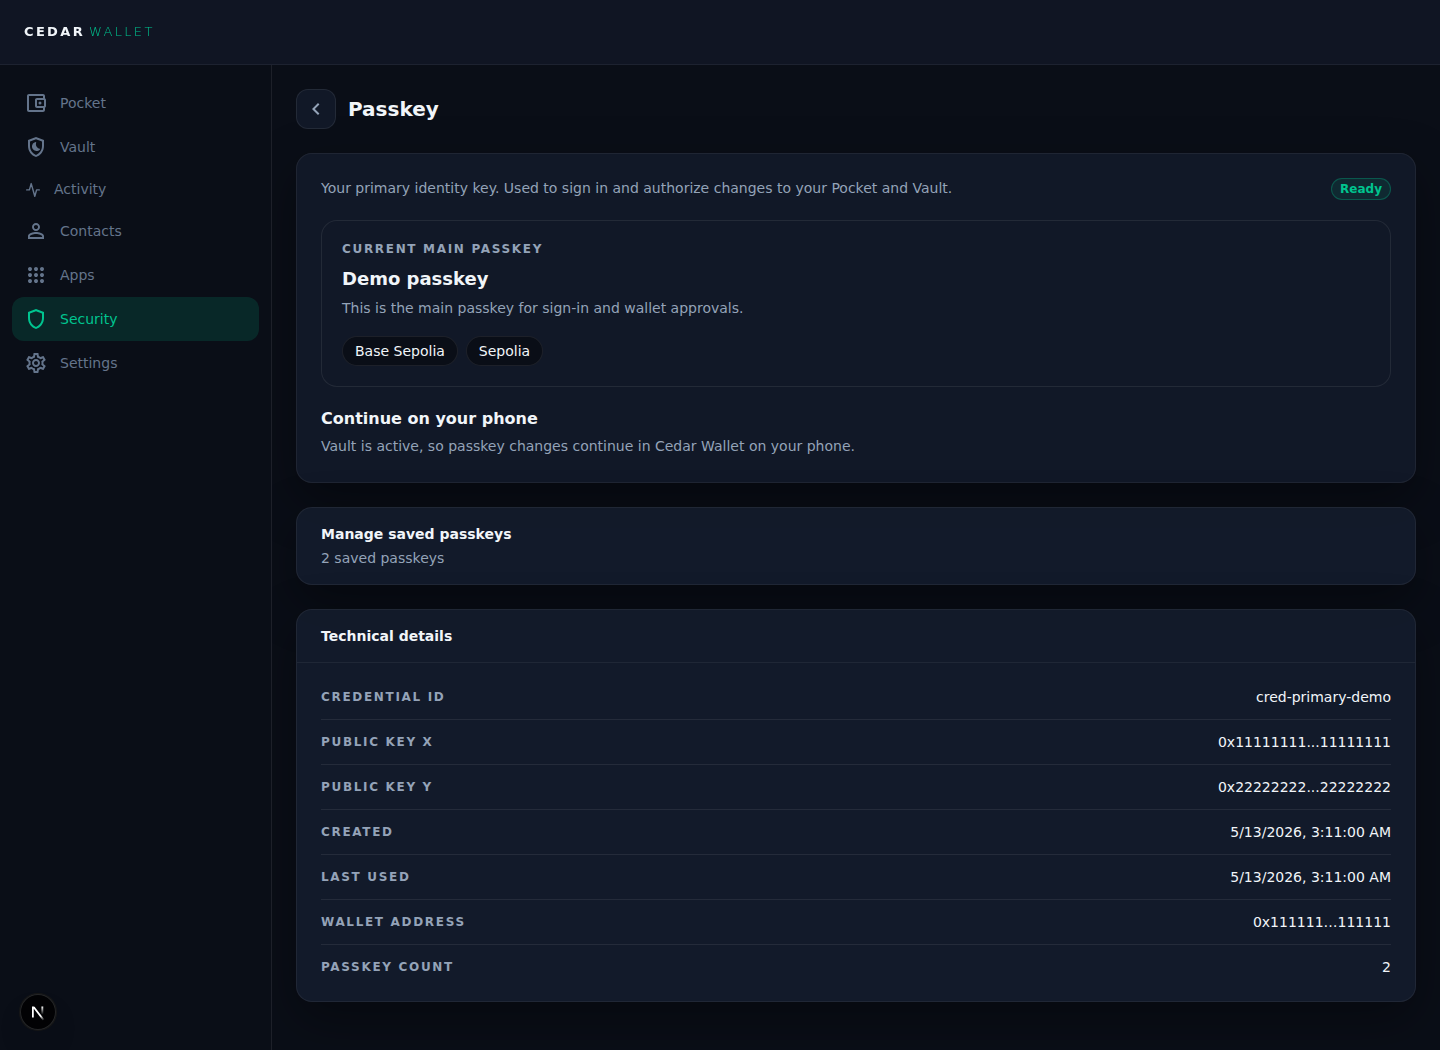
Passkey
Your passkey signs you in and approves supported Cedar actions. Confirm Cedar shows the expected passkey state for this account.
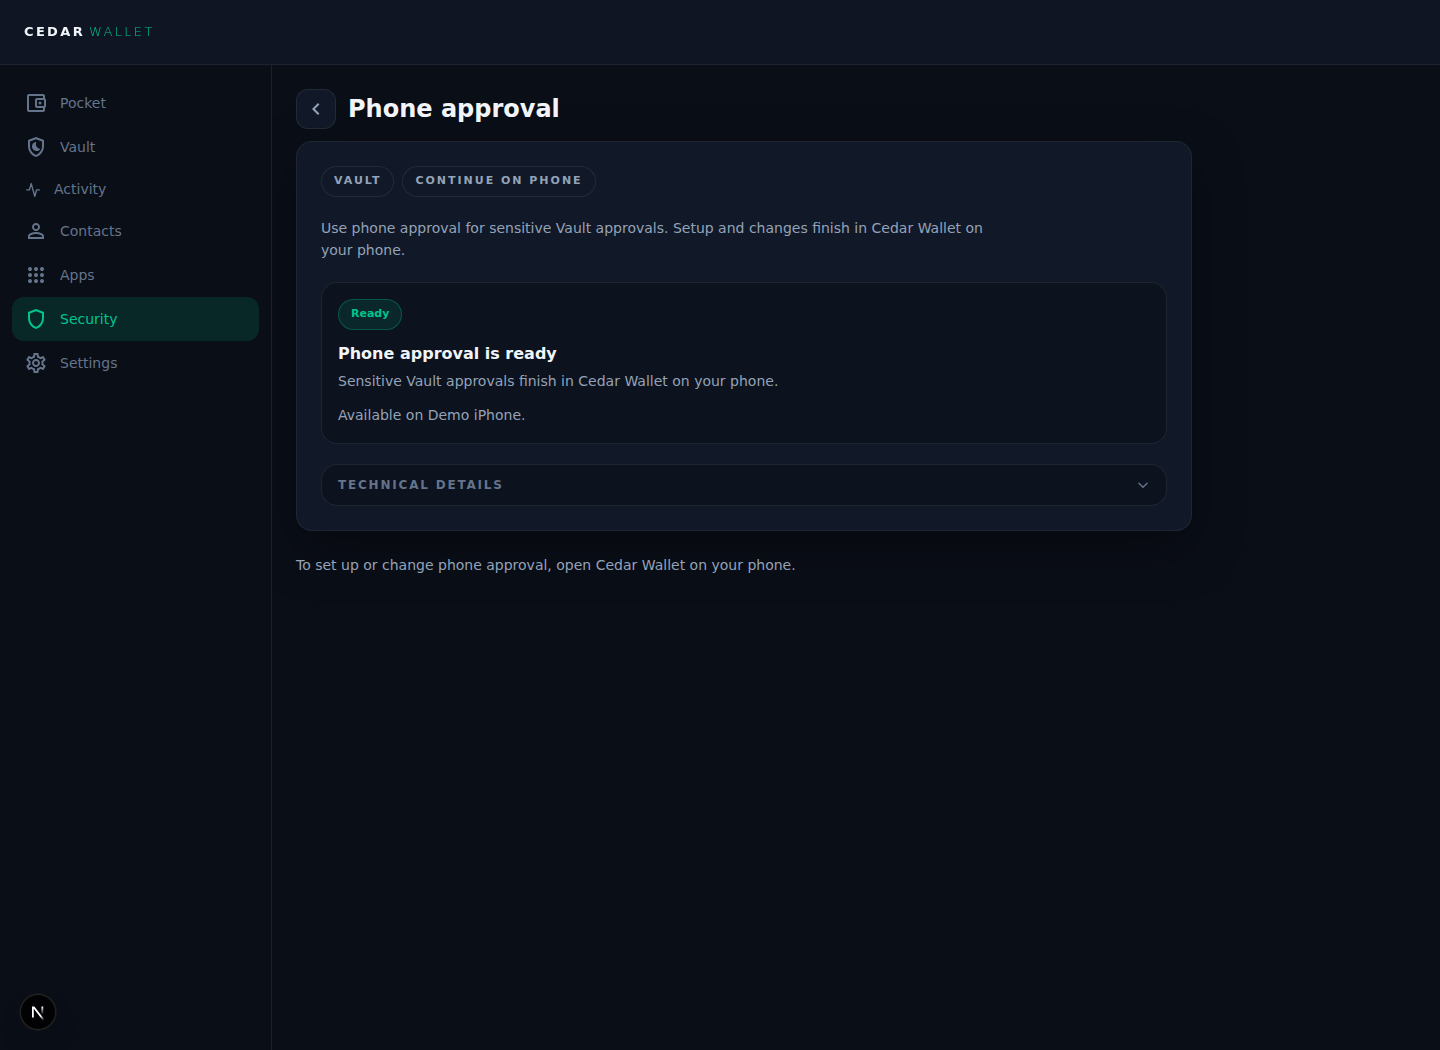
Phone approval or device key
Your trusted device is used for flows that need phone approval or device-key approval, including regular native Vault approvals. Confirm Cedar shows the expected trusted-device state.
Recovery phrase
Your recovery phrase is for recovery, device re-binding, and explicit fallback flows. It is not the default approval method for everyday Cedar actions.
If Cedar shows recovery words, do not screenshot or share them. Use a redacted screenshot or skip the screenshot.
Pocket protection
Pocket-protection status shows whether everyday Pocket actions have the expected safeguards. Confirm the state matches the account you are using.
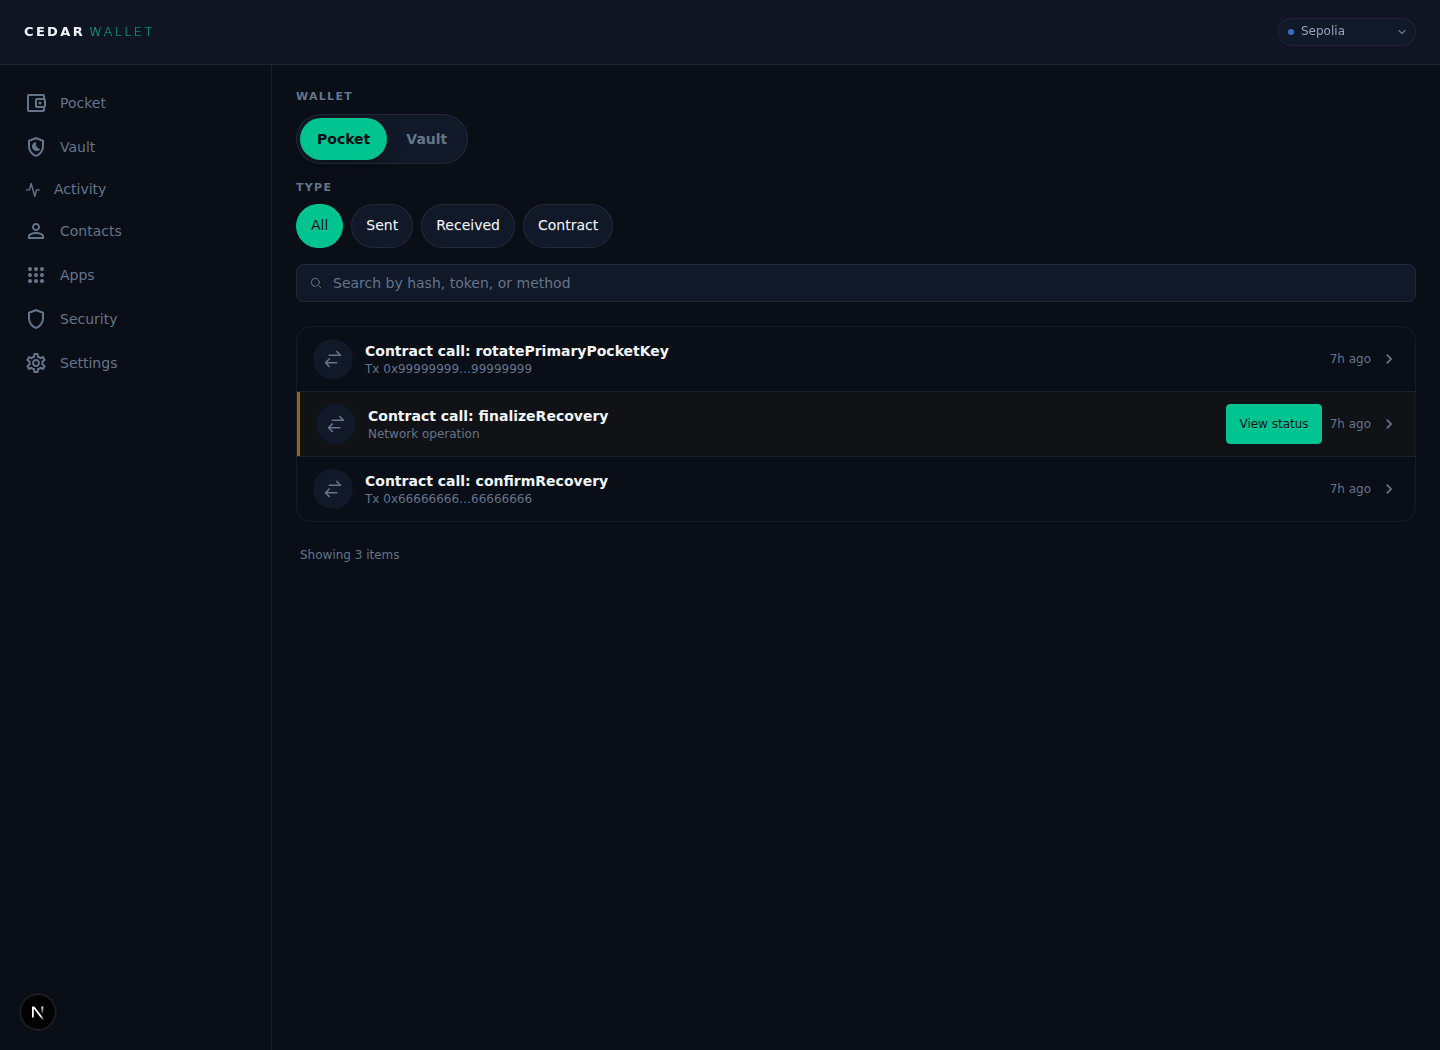
Step 4: Check Operations
Open Operations and look for security-related activity.
Security, recovery, rotation, and handoff work should have visible status. Cedar should show whether an operation is pending, included, failed, canceled, or waiting for a handoff.
If an operation is pending, do not submit the same action again unless Cedar says the first one failed. Return to Operations later and continue from the current status.
Step 5: Review a safe access change
Use the smallest access-change action Cedar shows for the current demo account. If no public access-change flow is ready, treat this step as review-only and do not submit an action.
Safe options may include:
- Adding a new passkey.
- Replacing a demo passkey.
- Re-binding a trusted device.
- Reviewing where rotation status appears without submitting a rotation.
Before confirming any access change, check:
- The account is the expected account.
- The device is yours or the prepared demo device.
- The request says the expected action.
- No private recovery material is visible.
If Cedar does not clearly show the access-change action, stop at review. Do not force a recovery or rotation flow just to complete the tutorial.
Step 6: Find emergency recovery on native
Emergency recovery starts from signed-out Cedar native. Signed-in Security may show recovery status or resume cues, but it is not the emergency recovery entrypoint.
On Cedar native:
- Use a prepared signed-out device, or sign out only if you know it is safe for this account.
- Open the sign-in screen.
- Find the recovery entrypoint.
- Stop before entering private recovery material unless this is a prepared demo account.
Step 7: Continue only with a prepared recovery account
Complete a recovery or resume scenario only on a prepared demo account. Do not use a real account just to test recovery.
A safe public demo should cover one path, not every edge case:
- Start recovery from signed-out Cedar native.
- Use the prepared account and approved demo material.
- Confirm the account being recovered.
- Replace or re-bind the passkey or trusted device if Cedar asks for it.
- Resume after app restart or pending state if Cedar supports it.
- Return to
Security.
Use only redacted screenshots for this step. Do not show recovery words or private material.
If recovery cannot continue, use the support path Cedar shows. Do not send private recovery material to anyone.
Step 8: Confirm the final state
Return to Security and Operations.
Confirm:
Securityshows the expected passkey, trusted-device, recovery phrase, and Pocket-protection state.Operationsshows the final recovery, rotation, or resume status.- The account can sign in with the intended credential.
- If a credential was replaced, Cedar makes the old credential behavior clear.
Use a final Security or Operations screenshot only if it does not reveal private material.
If something does not work
- If
Securityis missing, confirm you are signed in to the correct Cedar account and using the expected app surface. - If a passkey prompt does not appear, restart the same action and check browser or device prompts.
- If the trusted-device state is missing or wrong, stop and use the correct prepared device or account.
- If Cedar shows recovery material, do not screenshot or share it.
- If recovery starts from a signed-in screen, stop and confirm the current entrypoint. Emergency recovery should start from signed-out native.
- If the recovery account is not the account you expected, stop before approving anything.
- If an operation is pending, check
Operationsinstead of repeating the action. - If recovery is blocked, use Cedar's support path and never send private recovery material in chat, email, support tickets, or screenshots.
You are done when
- You can find
Security. - You can explain what protects the account: passkey, phone approval or device-key, recovery phrase, and Pocket protection.
- You know that emergency recovery starts from signed-out Cedar native.
- You have reviewed or completed one safe access-change path.
- You have found or completed one prepared recovery or resume path.
Operationsshows the final status clearly.
You should now know where Cedar shows account safety, where normal access changes belong, and where to start if access is lost.