Cedar Wallet
Set up Vault and add a Pocket spending limit
This tutorial continues after Pocket is active. You will set up Vault, create a small spending limit for Pocket, and check the operation status.
Pocket is for everyday use. Vault is for higher-trust controls such as larger balances, spending limits, key rotation, and recovery. A spending limit lets Pocket use a set amount from Vault while Vault stays protected by stronger approval.
Some Vault actions need Cedar Wallet on your phone. Web can start or show these actions, but final approval may continue in native.
Safety rule
Never share your recovery phrase, private recovery material, passkey prompts, or screenshots that reveal them. Cedar support should not ask for them.
What you will do
- Confirm Pocket is active.
- Open Vault.
- Set up Vault and save the recovery phrase if Cedar asks for one.
- Create a small Pocket spending limit.
- Try a small supported action within the limit.
- Check
Operationsfor the final status.
Before you start
Start from the end of the Pocket tutorial. Your Pocket should be active, funded with test USDC, and ready for everyday actions.
You need:
- A Cedar account with an active Pocket.
- Test USDC from the first tutorial.
- Cedar Wallet on your phone if Cedar asks for phone approval.
- A demo account where Vault setup and spending limits are enabled.
You do not need:
- Real money.
- A seed phrase from another wallet.
- Testnet ETH for Cedar gas.
- A separate browser wallet.
Step 1: Confirm Pocket is active
Open Cedar and check Pocket.
You should see:
- A test USDC balance.
SendandReceive.- No pending Pocket activation step.
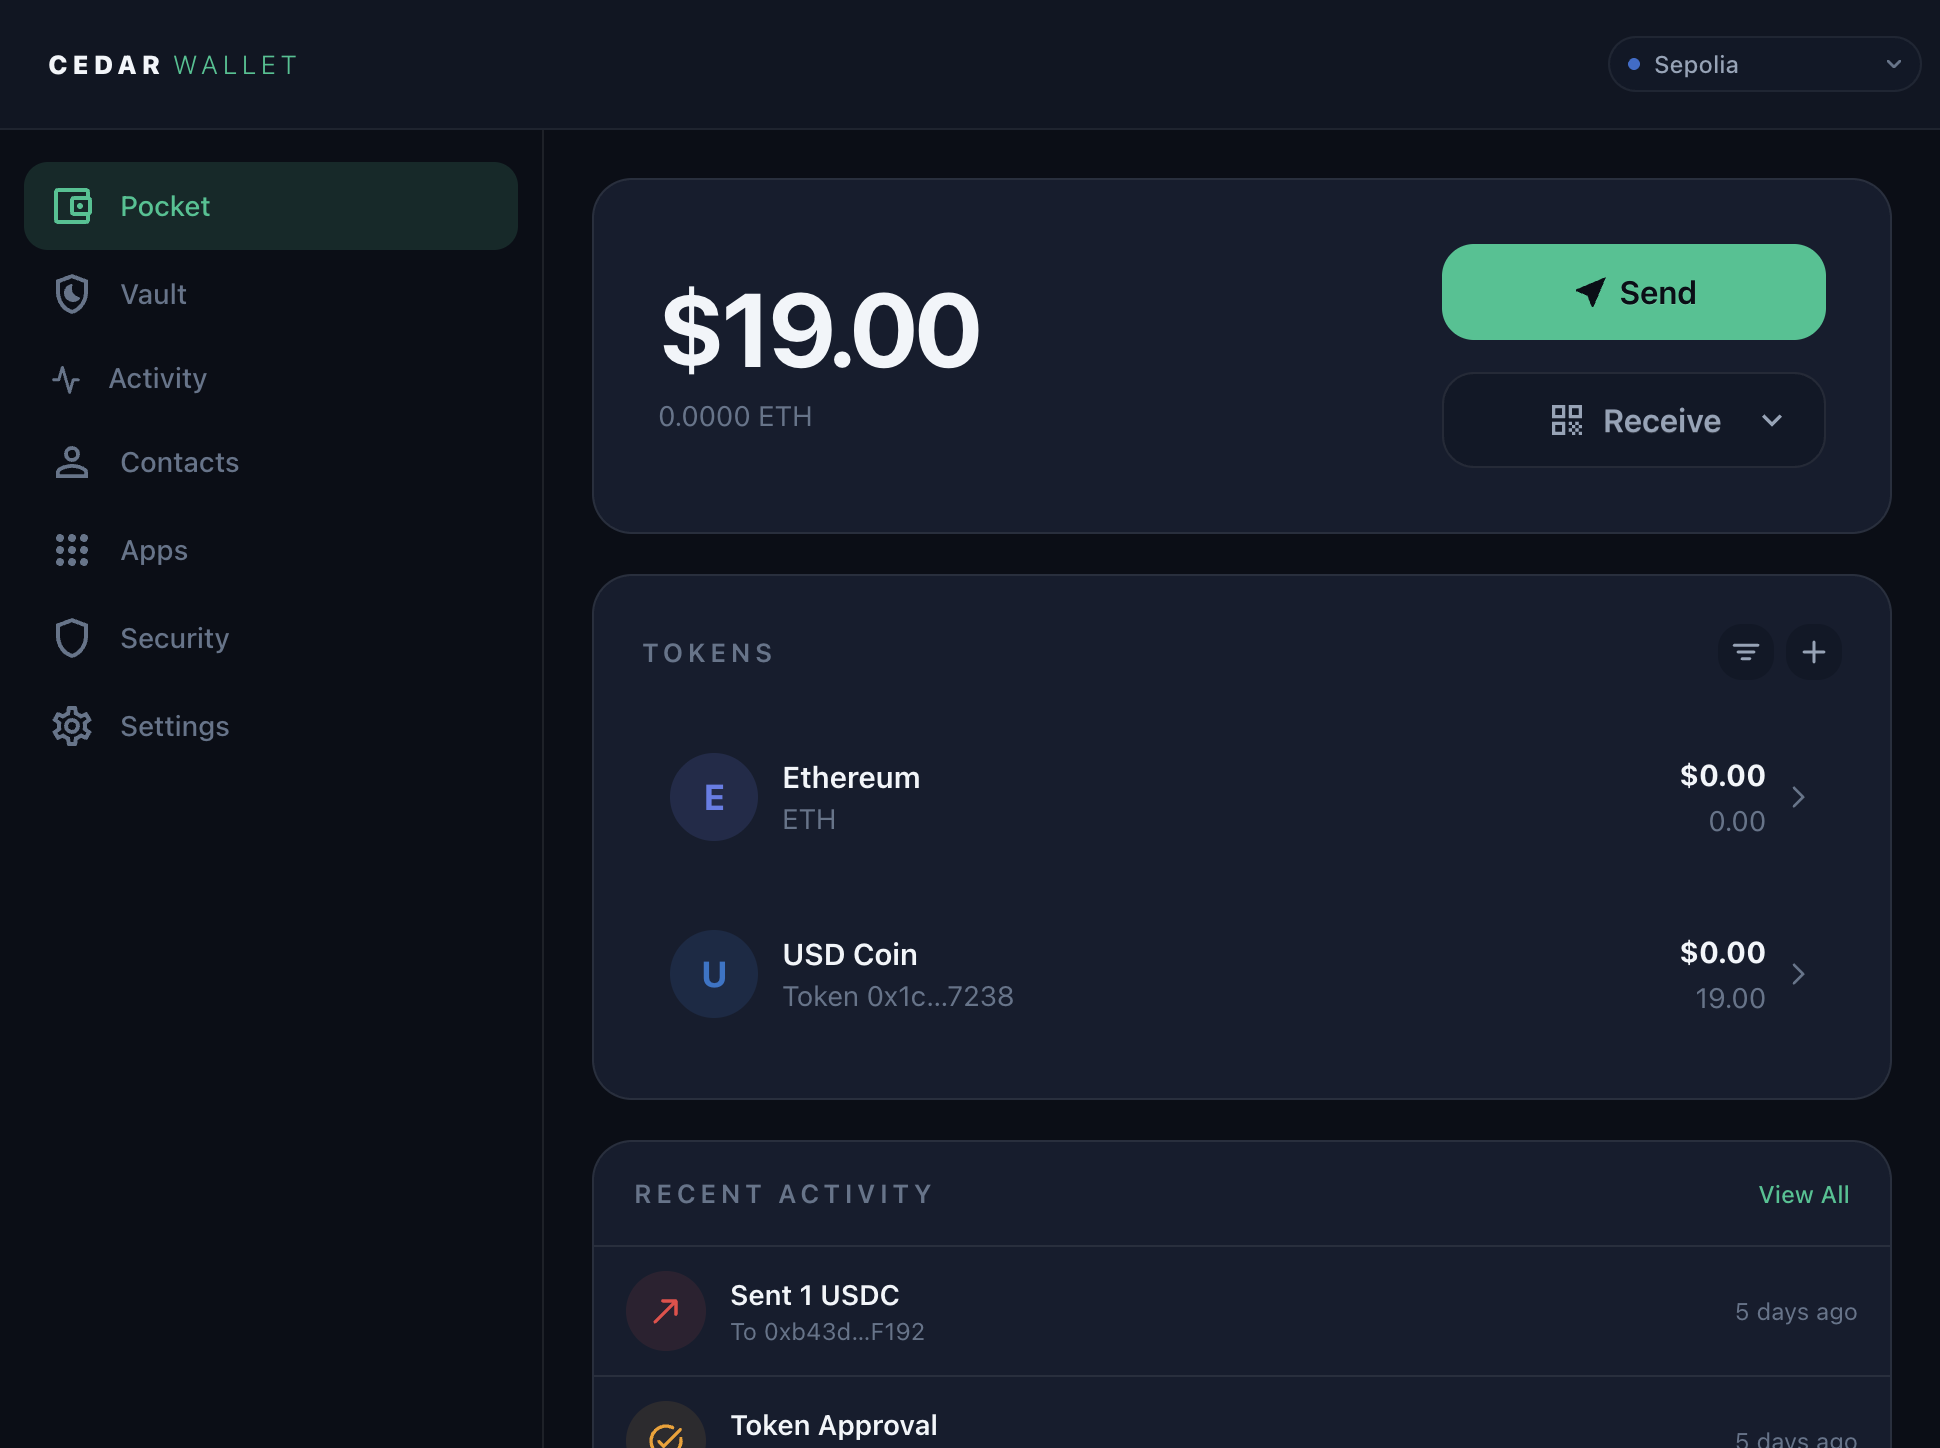
If Pocket is not active, complete the first tutorial before continuing.
Step 2: Open Vault
Open Vault in Cedar.
Vault should show one of these states:
- ready to set up
- already ready
- waiting for an approval or handoff
- not available for this account or environment
Continue only if Cedar shows that Vault setup or Vault management is available for your account.
If Vault is missing or blocked, stop here. Use an account where Cedar shows Vault setup.
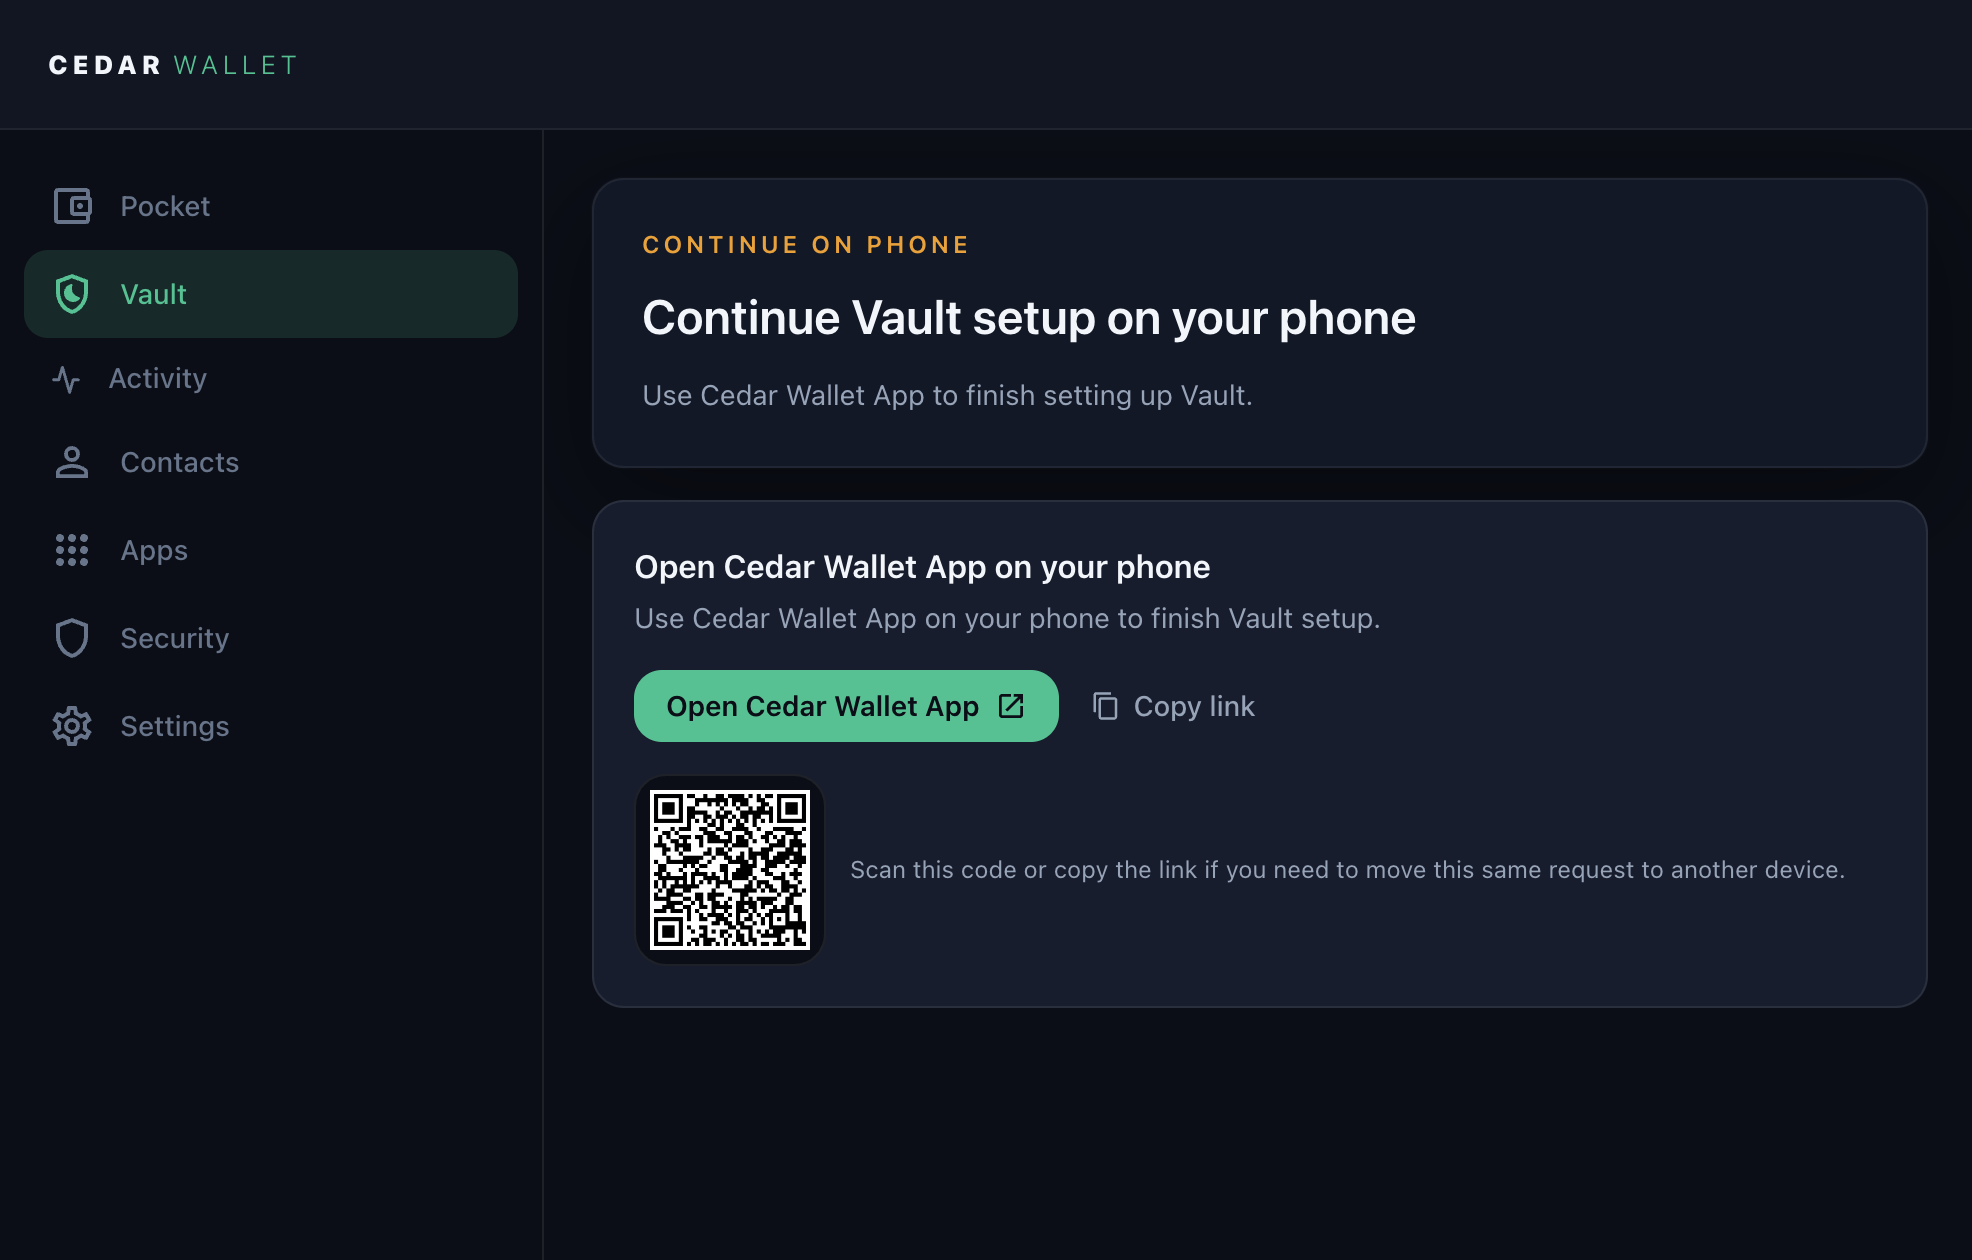
Step 3: Set up Vault
Start Vault setup from the Cedar surface that shows the setup action.
Follow Cedar's prompts. Cedar may ask you to continue on your phone. This is expected for Vault actions that need phone approval.
If Cedar asks you to create or save a recovery phrase, write it down and store it privately. Do not save it in chat, email, support tickets, or screenshots.
The recovery phrase is for recovery, device re-binding, and explicit fallback flows. It is not the default approval method for everyday Cedar actions.
If Cedar hands off to native:
- Open Cedar Wallet on your phone.
- Sign in with the same Cedar account.
- Open the pending Vault task or handoff link.
- Review the Vault setup request.
- Confirm only if the account, wallet, network, and action match what you started.
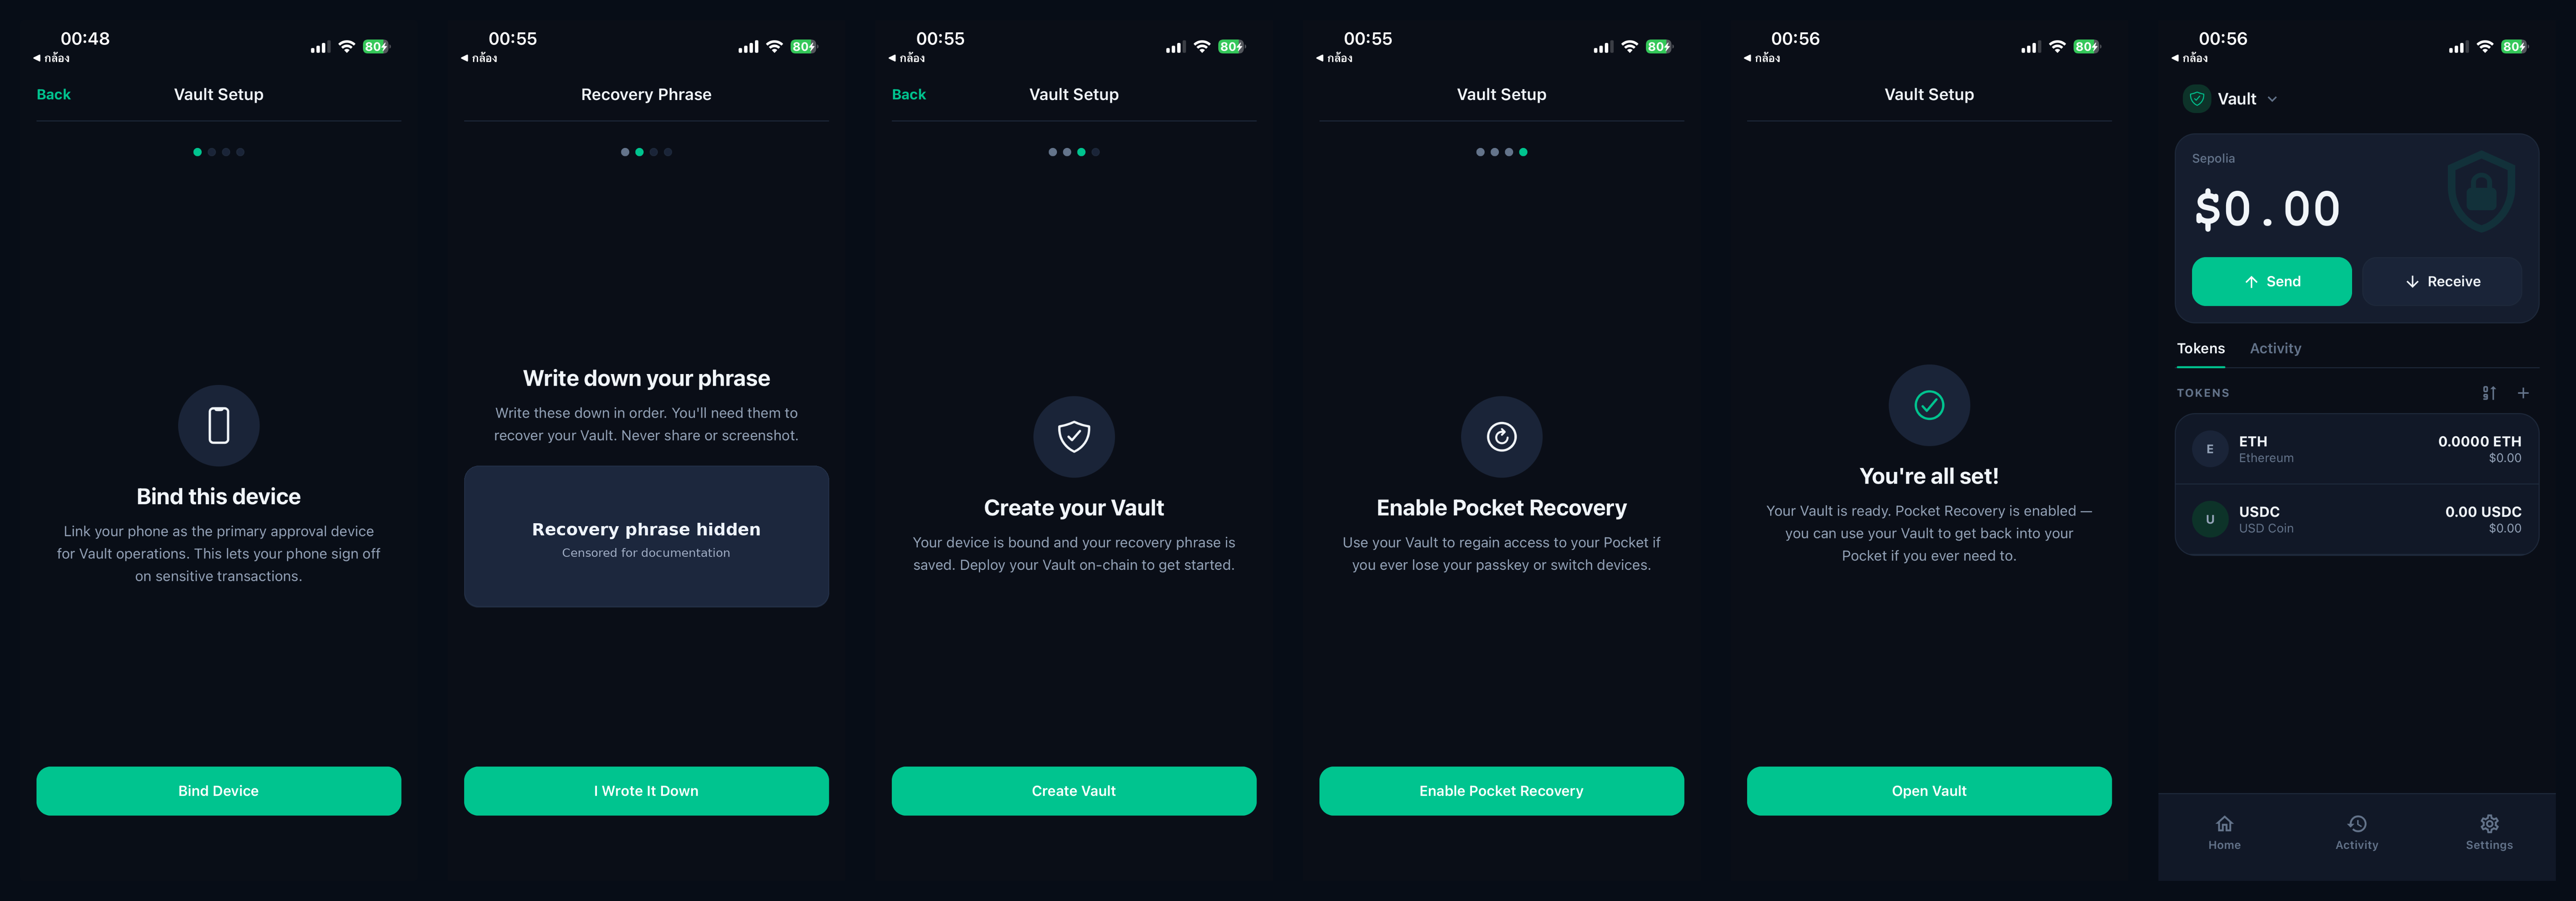
When setup finishes, return to Vault and confirm that Cedar shows Vault as ready. If setup stays pending, wait or check Operations. Do not start a second setup unless Cedar says the first one failed.
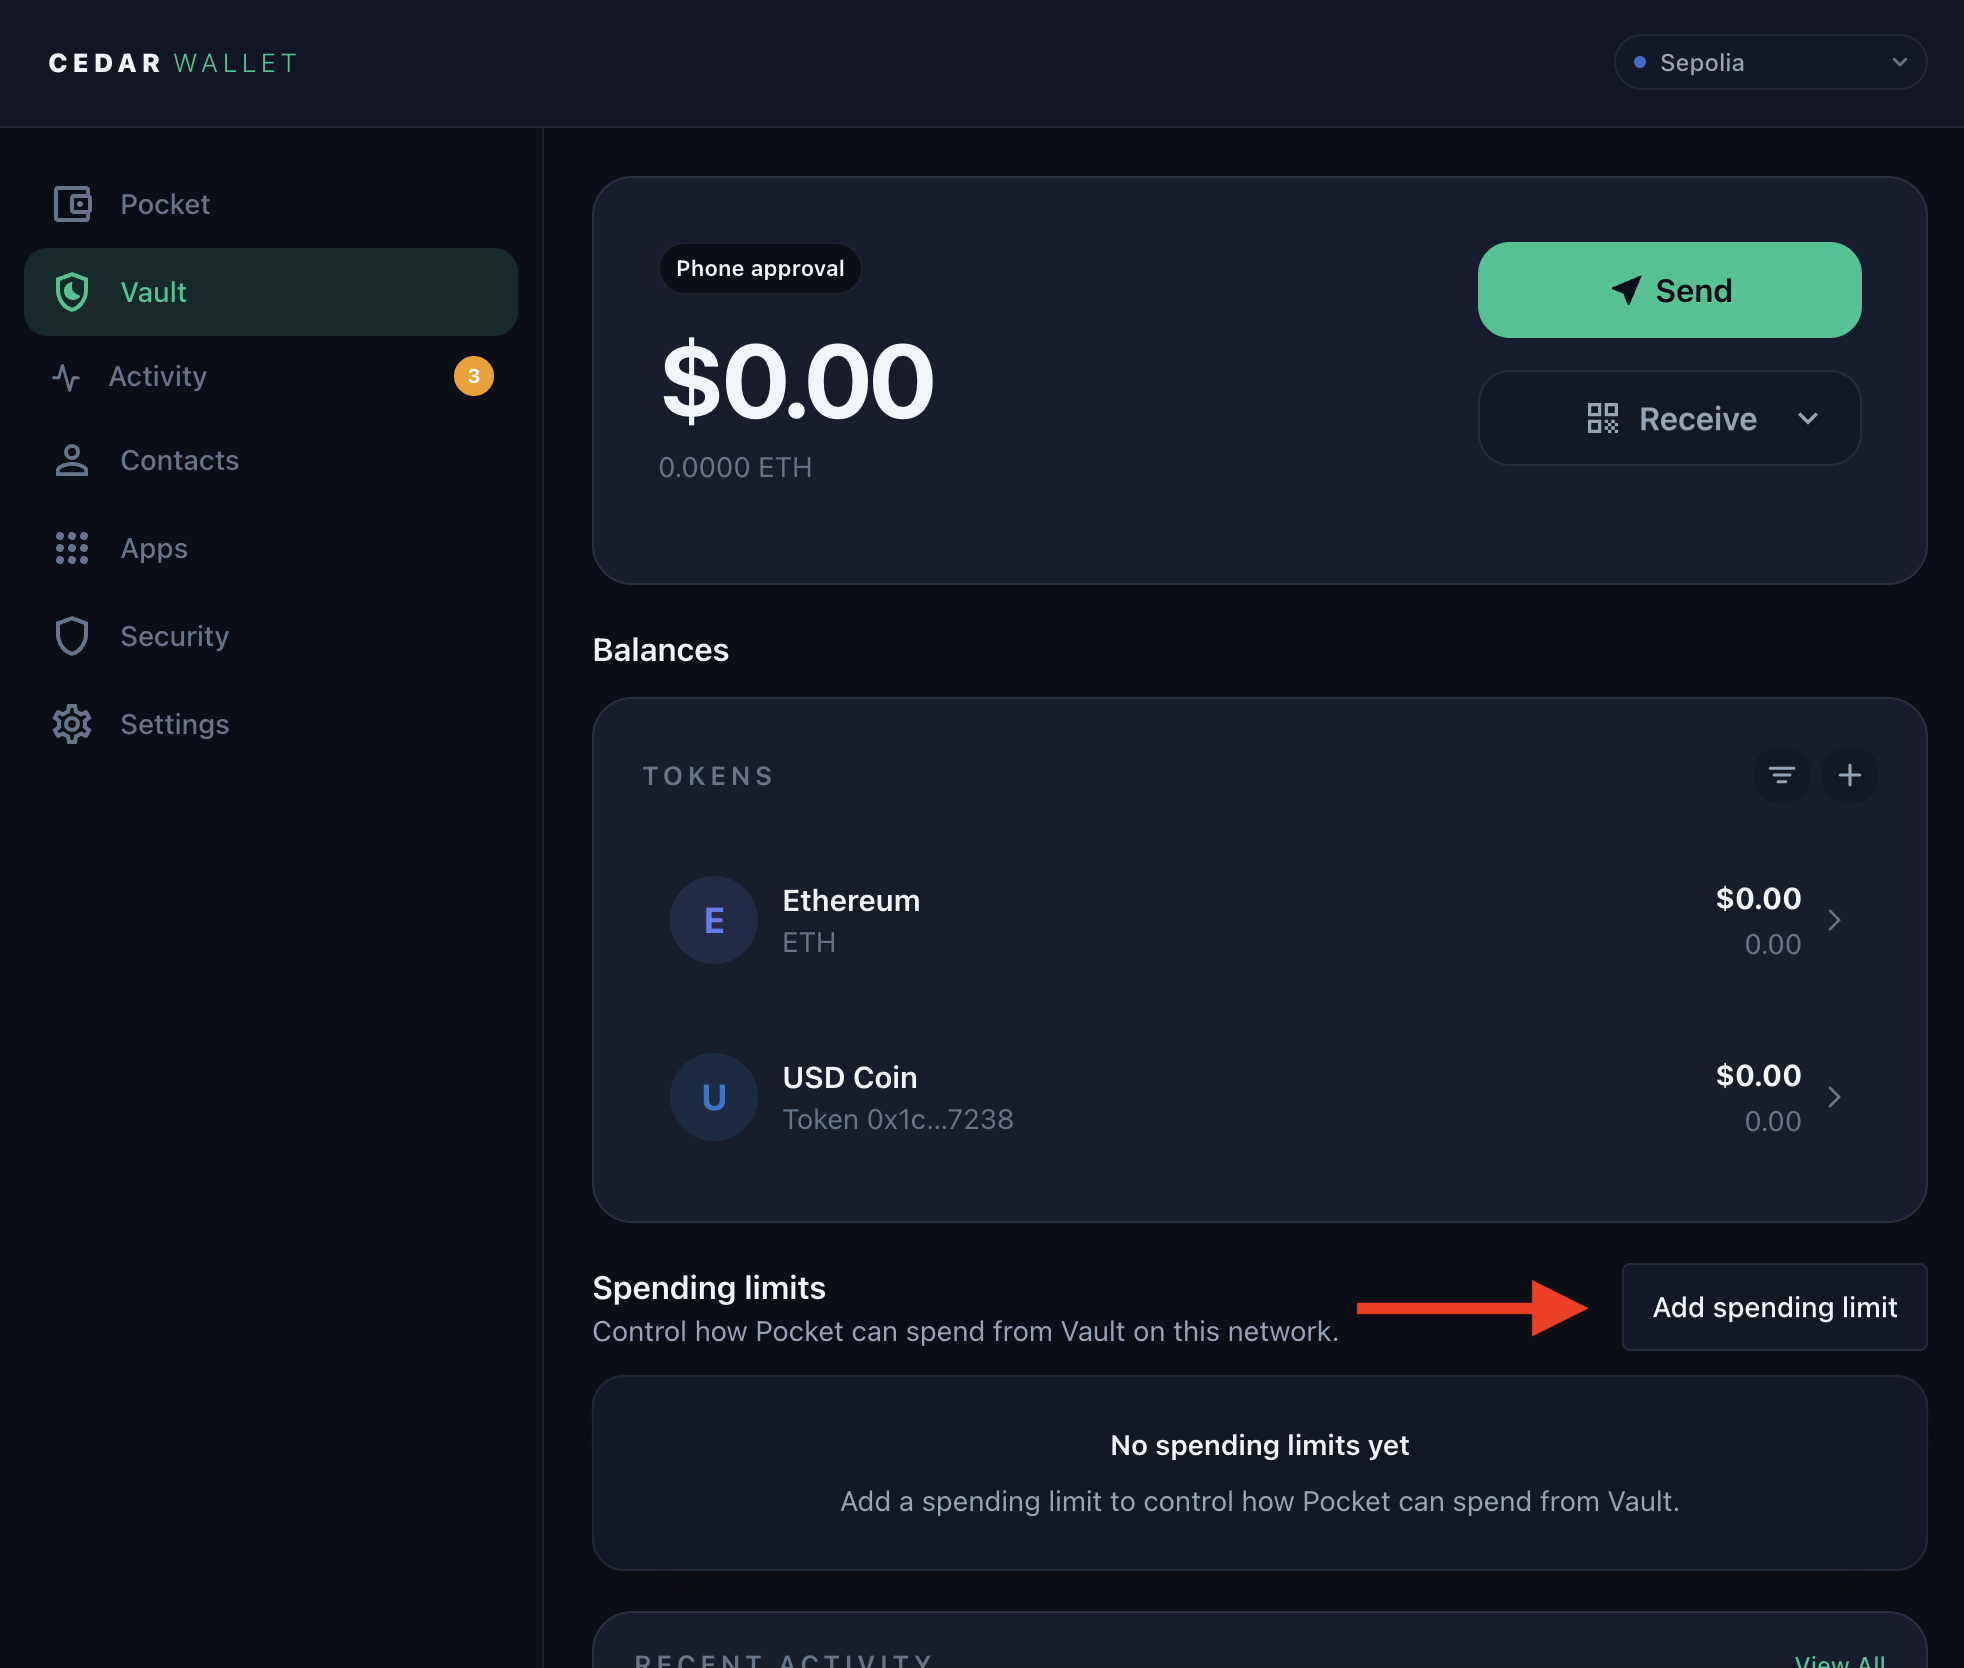
Step 4: Add a Pocket spending limit
When Vault is ready, open Vault and choose Add spending limit.
Create a small test limit:
- Choose
Pocketas the wallet that can use the limit. - Choose test USDC as the token.
- Enter
2 USDCfor this tutorial. - Choose the period or reset rule if Cedar asks for one.
- Review the limit.
- Confirm only if the wallet, token, amount, and period are correct.
Spending-limit management is a Vault action. Cedar may ask for passkey approval and phone approval before it submits the change.
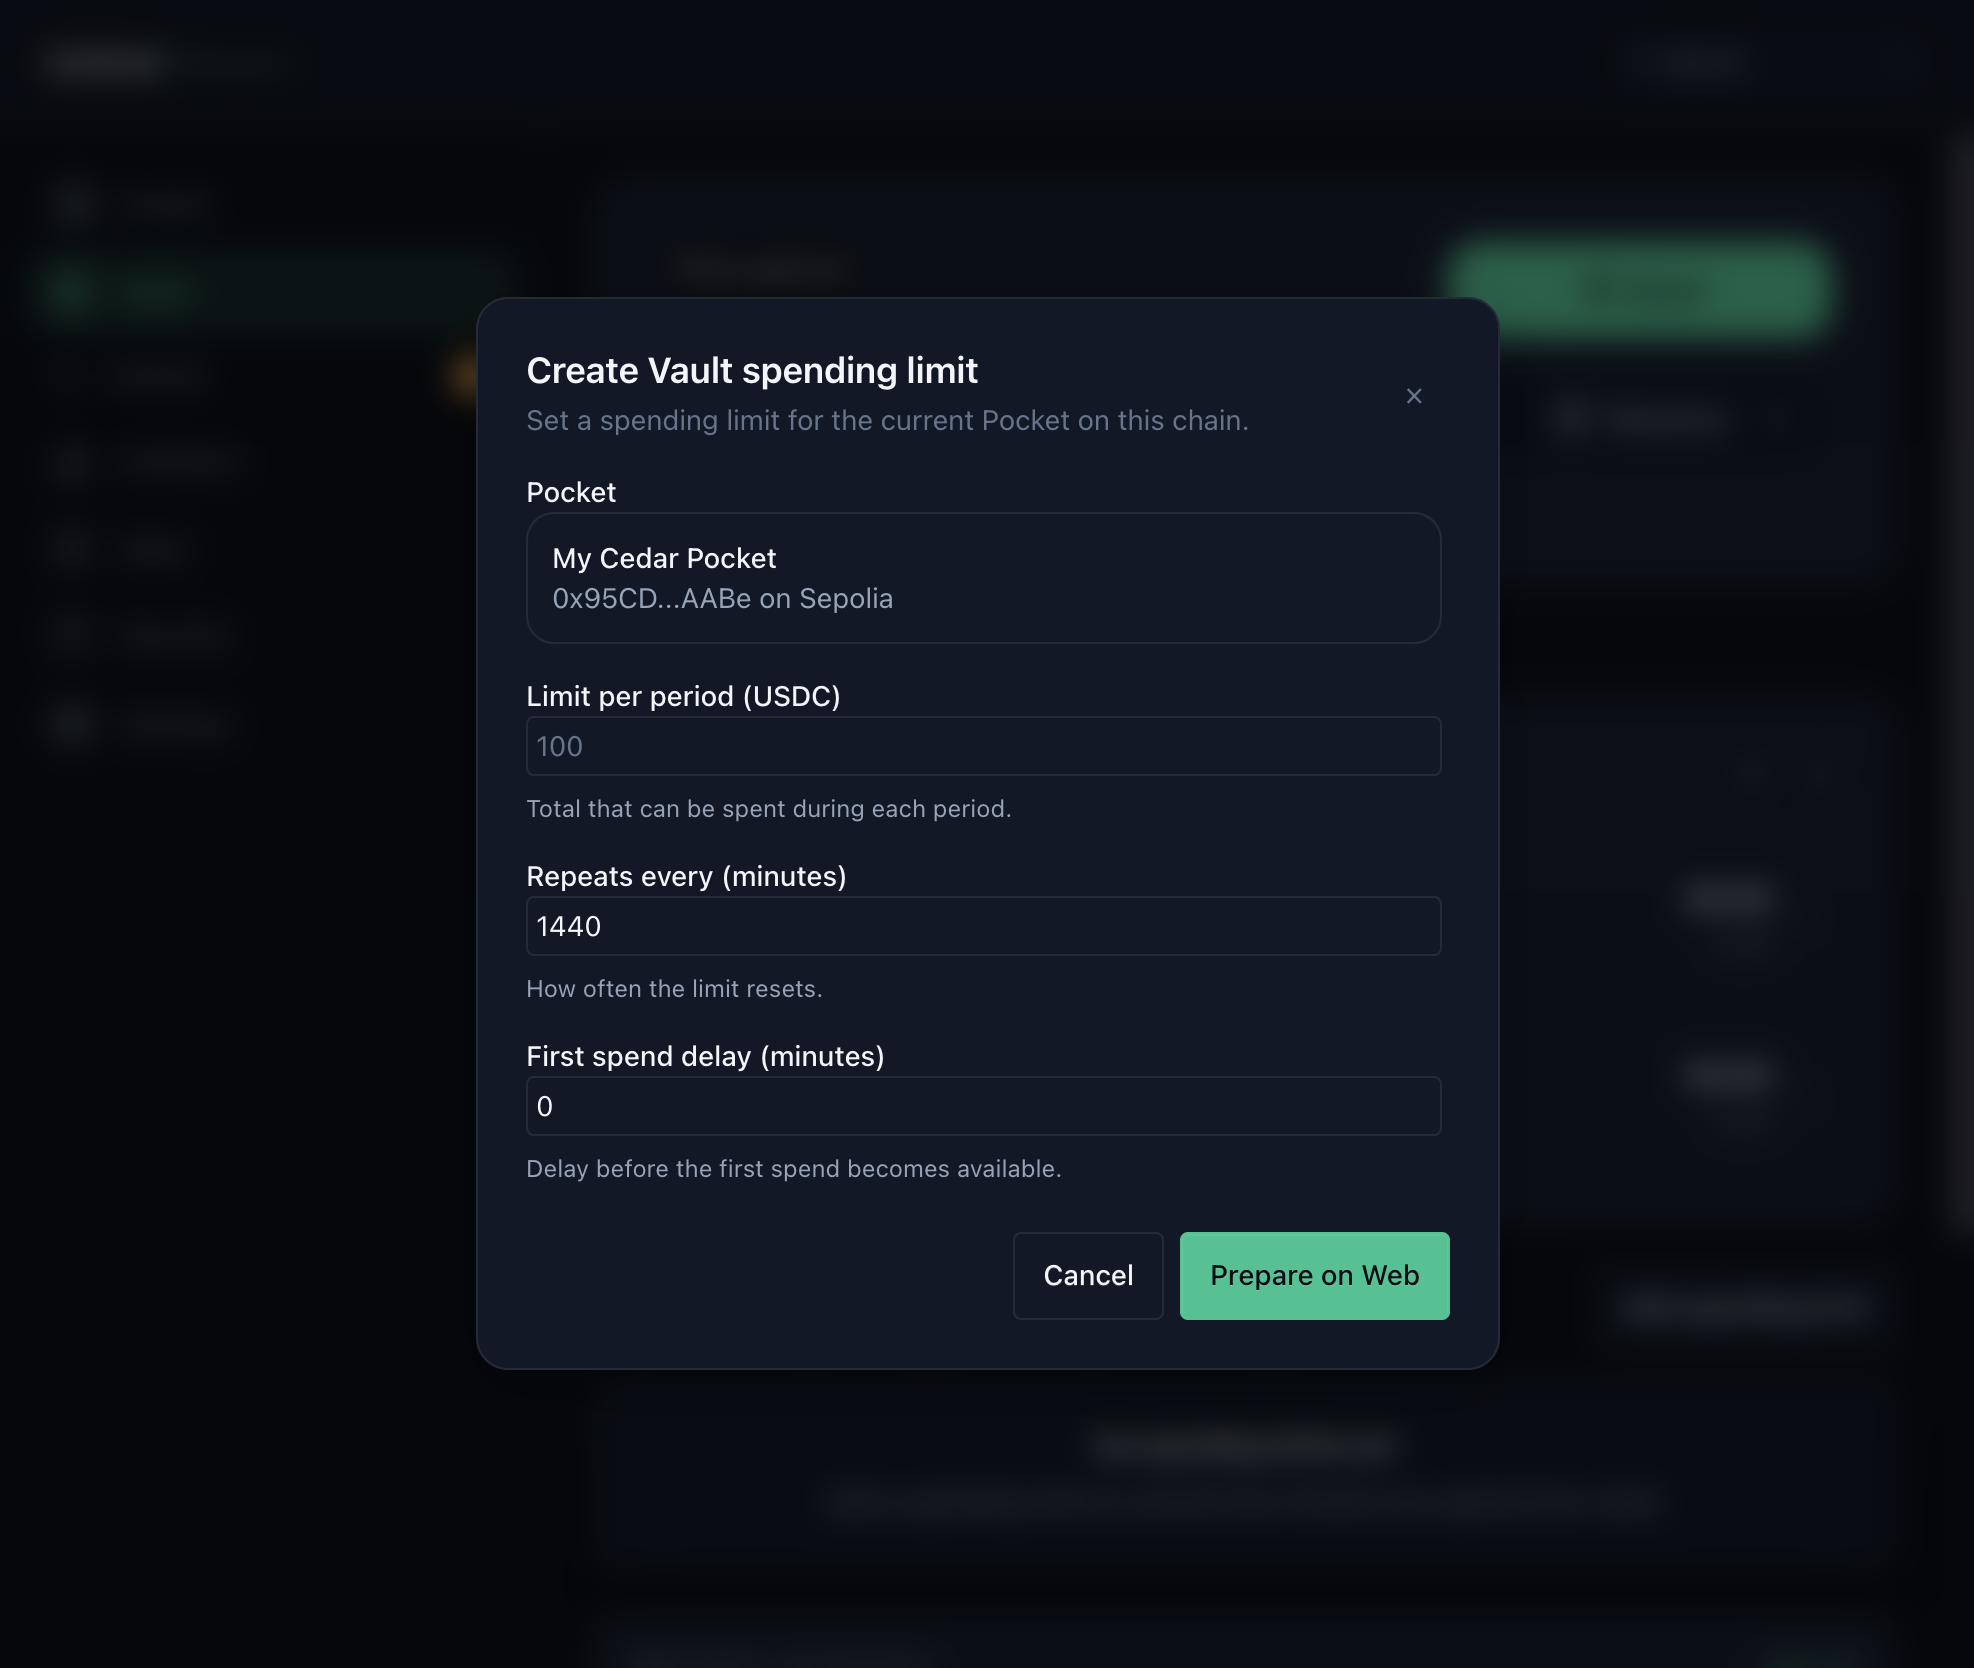
The form screenshot shows the amount field with a larger sample value. For this tutorial, use 2 USDC before you confirm so it matches the active limit shown below.
If Cedar says Vault is not ready, return to Vault setup before creating the limit.
Step 5: Try a small action within the limit
Use a small supported action that depends on the spending limit. Keep it simple: the goal is to confirm that Pocket can use the approved Vault-backed limit.
Before confirming, check:
- The token is test USDC.
- The amount is within the spending limit.
- The recipient or app is expected.
- The request comes from Cedar or the expected demo app.
If the amount is over the limit, lower the amount or stop. Do not change the limit just to make an unexpected request pass.
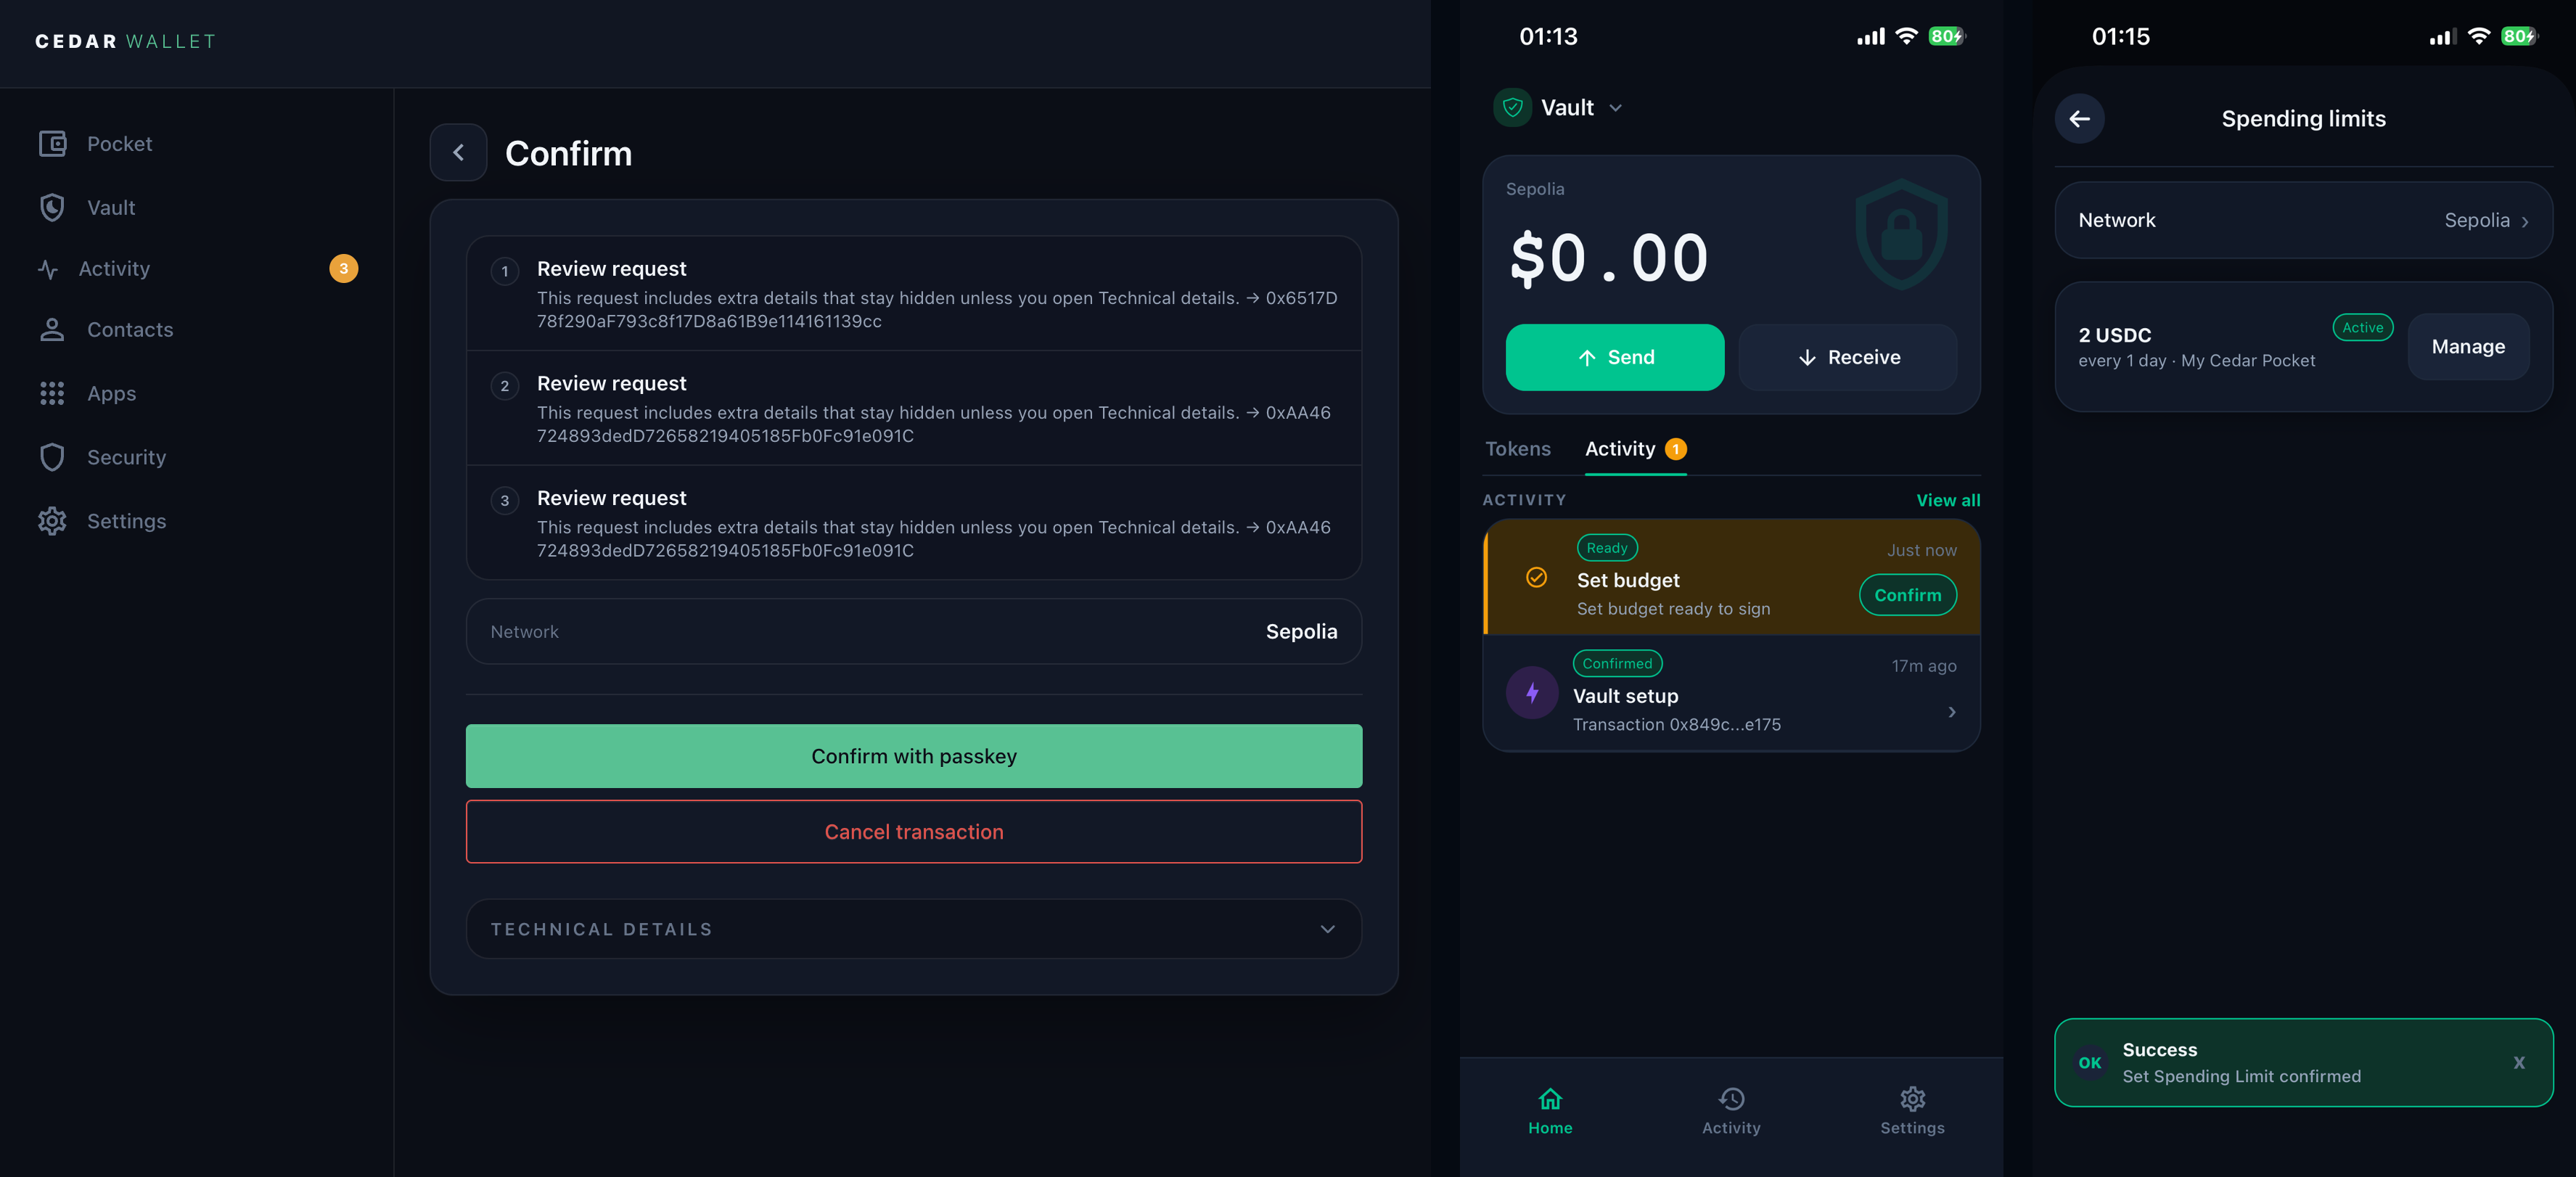
Step 6: Check Operations
Open Operations after Vault setup, spending-limit creation, or the test action.
Find the related operation and check its status. Cedar should show whether the operation is pending, included, failed, canceled, or waiting for a handoff.
If an operation is pending, do not repeat the same action unless Cedar says it failed. Return to Operations later and continue from the current status.
If something does not work
- If Vault setup is missing, use an account and environment where Vault setup is enabled.
- If Cedar asks you to continue on phone, use native with the same account and resume the same task.
- If the handoff opens the wrong account, stop and sign in with the correct account before approving anything.
- If Cedar asks for a recovery phrase, store it privately and do not screenshot it.
- If spending-limit setup is blocked, confirm Vault is ready first.
- If the action is over the limit, lower the amount or stop.
- If an operation stays pending, check
Operationsinstead of repeating the action. - If Cedar shows a failed or canceled operation, retry only from the safe next step Cedar shows.
- If Cedar shows a Vault request you do not recognize, reject it.
You are done when
- Vault is ready.
- Pocket has a small test spending limit.
- A supported test action within that limit has completed or reached the expected pending state.
Operationsshows the Vault setup, spending-limit, or action status clearly.
You should now understand the basic split: Pocket is for everyday use, Vault protects higher-trust controls, and Cedar will tell you when a Vault action needs phone approval.